内核实践-linux5.12.0-rc8
这篇文章除了回顾,更多的是希望能进一步探索内核,包括gdb和qemu
环境配置 本地系统为ubuntu14,gcc和g++版本都太老,需要升级到ubuntu16.
1 2 3 4 gcc (Ubuntu 6 .5 .0 -2 ubuntu1 ~16 .04 ) 6 .5 .0 20181026 g ++ (Ubuntu 6 .5 .0 -2 ubuntu1 ~16 .04 ) 6 .5 .0 20181026
升级gcc和g++如下
1
2
3
4
5
6
7
8
9
10
11
12
sudo add-apt-repository ppa:ubuntu-toolchain-r/test sudo apt-get update sudo apt-get install gcc-6 g++-6 # cd /usr/bin # rm -rf gcc # ln -s gcc-6 gcc lrwxrwxrwx 1 root root 7 4 月 15 18 :50 gcc -> gcc-6 # rm -rf g++ # ln -s g++-6 g++ lrwxrwxrwx 1 root root 7 4 月 15 18 :51 g++ -> g++-6
编译 回到主目录
在编译前,先简单介绍一下内核相关文件的存放路径
内核源码放置路径 目前我们系统uname -r 为:4.4.0-210-generic ,源代码路径:/usr/src/linux-headers-4.4.0-210-generic 配置文件,内核引导文件,虚拟挂载系统文件 /boot config-4.4.0-210-generic vmlinuz-4.4.0-210-generic initrd.img-4.4.0-210-generic 模块安装路径: 方便我们动态链接模块 /lib/modules/4.4.0-210-generic 编译内核文档 linux提供了内核帮助文档,这里支持很多种格式,这里我使用html的,使用sphinx编写,需要配置环境
1
2
3
4
5
6
7
8
9
10
11
12
13
14
15
16
17
18
19
20
21
22
23
24
25
26
27
28
29
30
31
32
33
34
35
36
37
38
39
// 安装依赖包apt-get install graphviz dvipng latexmk librsvg2-bin texlive-xetex // window10内核子系统需要额外安装,否则make menuconfig异常apt-get install python3-pip libncurses-dev flex bison libelf-dev // 通过pip安装 sphinx_rtd_themeTraceback (most recent call last): File "/usr/bin/pip" , line 11 , in <module> sys.exit (main()) File "/usr/local/lib/python2.7/dist-packages/pip/__init__.py" , line 16 , in main from pip._internal.utils.entrypoints import _wrapper File "/usr/local/lib/python2.7/dist-packages/pip/_internal/utils/entrypoints.py" , line 3 , in <module> from pip._internal.cli.main import main File "/usr/local/lib/python2.7/dist-packages/pip/_internal/cli/main.py" , line 60 sys.stderr.write(f"ERROR: {exc}" ) // pipe版本不对,需要升级到pip3.5 pip: /usr/ bin/pip /u sr/local/ bin/pip3.5 /u sr/local/ bin/pip /u sr/local/ bin/pip3.4 /u sr/local/ bin/pip2.7 /u sr/share/m an/man1/ pip.1 .gz // 通过pip3.5 重新安装sphinxInstalling collected packages: pytz, sphinxcontrib-serializinghtml, sphinxcontrib-qthelp, sphinxcontrib-jsmath, sphinxcontrib-htmlhelp, sphinxcontrib-devhelp, sphinxcontrib-applehelp, snowballstemmer, Pygments, packaging, imagesize, docutils, babel, alabaster, sphinx, sphinx-rtd-theme Attempting uninstall: pytz Found existing installation: pytz 2014.10 Uninstalling pytz-2014.10 : Successfully uninstalled pytz-2014.10 Successfully installed Pygments-2.8 .1 alabaster-0.7 .12 babel-2.9 .0 docutils-0.16 imagesize-1.2 .0 packaging-20.9 pytz-2021.1 snowballstemmer-2.1 .0 sphinx-3.5 .4 sphinx-rtd-theme-0.5 .2 sphinxcontrib-applehelp-1.0 .2 sphinxcontrib-devhelp-1.0 .2 sphinxcontrib-htmlhelp-1.0 .3 sphinxcontrib-jsmath-1.0 .1 sphinxcontrib-qthelp-1.0 .3 sphinxcontrib-serializinghtml-1.1 .4 在Makefile下查看文档生成细节,mandocs已经不再支持 // 生成内核文档html// 查看内核文档浏览器: Documentation/output/i ndex.html
内核功能配置文件 编译前确定清除之前遗留的配置文件
最好使用本机系统使用的配置文件,从/boot/config-4.4.0-210-generic copy到 编译根目录.config
1 cp /boot/config-4 .4 .0 -210 -generic /github/linux/.config
以图形界面的方式选择内核功能
1 make menuconfig >我们在我们copy 过来的配置上增加修改,配置完成保存下来的和copy 过来的不是完全一样的
这里我们针对我们之后需要的调试做配置修改
1
2
3
4
5
6
7
8
9
10
11
12
确定CONFIG_GDB_SCRIPTS打开 确定架构支持CONFIG_FRAME_POINTER CONFIG_FRAME_POINTER=y CONFIG_KGDB=y CONFIG_KGDB_SERIAL_CONSOLE=y CONFIG_FRAME_POINTER=y CONFIG_KGDB=y CONFIG_KGDB_SERIAL_CONSOLE=y CONFIG_KGDB_KDB=y CONFIG_KDB_KEYBOARD=y
增加initramfs编译到内核文件
1
2
3
4
CONFIG_BLK_DEV_INITRD =yCONFIG_INITRAMFS_SOURCE ="" >>这里需要设置为空,不然当挂载分区时会一直挂不上,mount_root函数处理create_dev("/dev/root" , ROOT_DEV) 返回报错-2 ,导致主动触发panic panic("VFS: Unable to mount root fs on %s" , b)CONFIG_INITRAMFS_ROOT_UID =0 CONFIG_INITRAMFS_ROOT_GID =0
内核编译 完整的内核编译生成
符号映射表,我们可以通过这个在内核运行异常时去根据符号找到对应的变量名 编译根目录System.map 压缩引导内核bzImage,属于gzip压缩的vmlinuz,不是ELF的vmlinux 虚拟文件系统,用来引导早期运行的驱动等,比如SCSI硬盘需要模块化,加载模块需要在根目录,但是此时硬盘根本无法使用,目录树不存在,故使用initrd来新建虚拟文件系统,仿真成为根目录,initrd.img-xxxx 需要mkinitrd生成 编译引导内核
1
2
3
4
make bzImage path # file bzImage bzImage : Linux kernel x86 boot executable bzImage , version 5 .12 .0-rc8 + (root@sholck ) #1 SMP Fri Apr 23 16 :19 :21 CST 2021 , RO-rootFS , swap_dev 0x9 , Normal VGA
编译模块
内核模块安装
1
2
3
make modules_install 模块copy到 /lib /modules /lib /modules 4.4 .0 -148 -generic 4.4 .0 -210 -generic 5.12 .0 -rc8+
创建虚拟文件系统
1
2
3
4
5
6
7
8
9
10
11
12
# mkinitramfs -o /boot /initrd.img-5.12.0-rc8+ 5.12.0-rc8+ #file /boot /initrd.img-5.12.0-rc8+ /boot /initrd.img-5.12.0-rc8+: ASCII cpio archive (SVR4 with no CRC ) <<实际使用报错 #mkinitramfs -o /boot /initrd.img-5.13.0-rc3+ 5.13.0-rc3+ cryptsetup: ERROR : Couldn't resolve device rootfs cryptsetup: WARNING: Couldn't determine root device grep: /proc/swaps: No such file or directory W: Couldn't identify type of root file system for fsck hook # file /boot /initrd.img-5.13.0-rc3+ >>格式不一样 /boot /initrd.img-5.13.0-rc3+: LZ4 compressed data (v0.1-v0.9)
copy内核文件到boot
1
2
#cp arch/x86/ boot/bzImage / boot/vmlinuz-5.12 .0 -rc8+ #cp .config /boot/ config-5.12 .0 -rc8+
vmlinux 未压缩的内核ELF文件,not stripped,可以供gdb调试使用
1 2 vmlinux : ELF 64 -bit LSB executable, x86 -64 , version 1 (SYSV), statically linked, BuildID[sha1 ]=3849 f6 b6 d84719 fc749595 fef84659843 f50 bb02 , not stripped
压缩过后的vmlinux文件
1 2 3 4 5 vmlinux .bin: ELF 64 -bit LSB executable, x86 -64 , version 1 (SYSV), statically linked, BuildID[sha1 ]=5 c57 d3 fb9 d396 d1 a98 b4 a482 e5 e8 d5 d26543 bdc1 , strippedvmlinux : ELF 64 -bit LSB shared object, x86 -64 , version 1 (SYSV), statically linked, not stripped
qemu-guest-run 回到主目录
先检查cpu是否支持虚拟化
1
2
# egrep -c '(svm|vmx)' /proc/ cpuinfo 12
检查本机已经加载的虚拟化模块
1
2
3
4
5
6
7
# lsmod |grep -n "kvm" 15 :kvm_intel 176128 0 39 :kvm 561152 1 kvm_intel42 :irqbypass 16384 1 kvm
qemu依赖包安装
1 apt-get install qemu qemu-kvm libvirt-bin virt-manager bridge-utils -y
检查qemu-kvm是否安装成功
1
2
3
# virsh -c qemu:///system list Id 名称 状态 ----------------------------------------------------
本次测试使用initramfs来运行
编写init代码,并打包到cpio中
1
2
3
4
5
6
7
8
9
10
11
12
13
14
15
16
17
18
cat > hello.c << EOF #include <stdio.h> #include <unistd.h> int main(int argc, char *argv[]){ printf("Hello world!\n" ) sleep (999999999 ) } EOF #gcc -static hello.c -o init #echo init | cpio -o -H newc | gzip > test.cpio.gz #echo init | cpio -o -H newc > test.cpio # file test.cpio test.cpio: ASCII cpio archive (SVR4 with no CRC) # file test.cpio.gz test.cpio.gz: gzip compressed data, last modified: Mon Apr 26 08 :21 :00 2021 , from Unix
执行测试
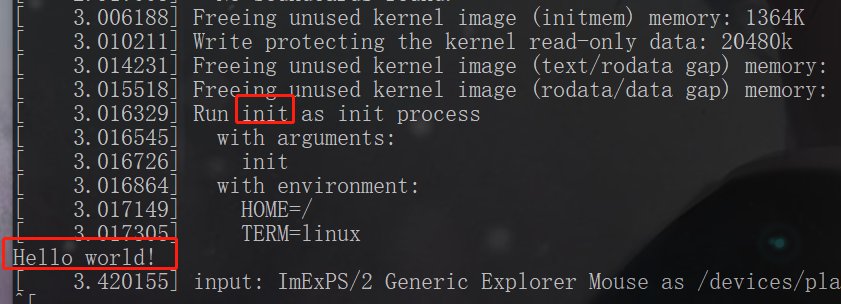
1
2
3
4
5
6
7
8
9
10
11
12
13
14
15
16
17
18
19
20
21
22
23
24
25
26
27
28
29
30
31
32
33
34
35
//命令行模式,init执行玩会卡住,正常设计逻辑 qemu-system-x86_64 -m 2G -enable-kvm -initrd test.cpio -kernel vmlinuz-5.12.0-rc8+ -s -append "console=ttyS0 rdinit=init loglevel=8" -nographic //窗口模式 ctrl+alt+f推出qemu窗口 ctrl+alt+g释放鼠标 qemu-system-x86_64 -m 2G -enable-kvm -initrd test.cpio -kernel vmlinuz-5.12.0-rc8+ -s -append "rdinit=init loglevel=8" //-m 指定guest 运行内存,默认为128M 对应报错 warning: TCG doesn't support requested feature: CPUID.01H:ECX.vmx [bit 5] qemu: fatal: Trying to execute code outside RAM or ROM at 0x00000000000b17f3 //-kernel 指定bzImage,不能是ELF的vmlinux 对应报错 qemu: linux kernel too old to load a ram disk //-initrd 指定cpio包,gzip -d 压缩或者不压缩都行, 我们自己制作 对应报错 Trying to unpack rootfs image as initramfs... Initramfs unpacking failed : write error // -s gdbserver端口,gdb可以通过这个端口和guest连接 //rdinit=init,指定rootfs下init的程序 正确打印: Run init as init process init作为init进程 with arguments: init with environment: HOME=/ TERM=linux Hello world! //如果kernel没有找到init进程,便会去解析参数root=,挂载另一个文件系统,将initrd image写入到 ram disk设备,这个时候需要指定root=作为ram disk Failed to create /dev/root: -2 VFS: Cannot open root device "(null)" or unknown -block (0 ,0 ): error -2 Kernel panic - not syncing: VFS: Unable to mount root fs on unknown -block (0 ,0 )
结果展示,WSL运行,ubuntu主机抄的原主机的config配置,没有Hello world打印
gdb 回到主目录
针对gdb调试,需要导入其包含符号表的vmlinux
1
2
3
4
#gdb file vmlinux 或者 #gdb vmlinux
连接guest的gdb server
1
2
3
(gdb) target remote:1234 Remote debugging using :1234 0xffffffffb9a7ce6e in ?? ()
设置断点
符号表对应 ffffffff82ce4bdb T start_kernel
1
2
3
b start_kernelNote : breakpoint 2 also set at pc 0 xffffffff82 ce4 bdb. Breakpoint 3 at 0 xffffffff82 ce4 bdb: file init/main.c, line 853
BusyBox 回到主目录
busybox下载地址
同kernel,配置文件为.config
配置安装 1 2 3 4 5 6 7 8 清除配置:make mrproper 配置config: make menuconfig 编译:make -j12 安装: make install 安装成功提示: You will probably need to make your busybox binary setuid root to ensure all configured applets will work properly.
制作initramfs 制作步骤:
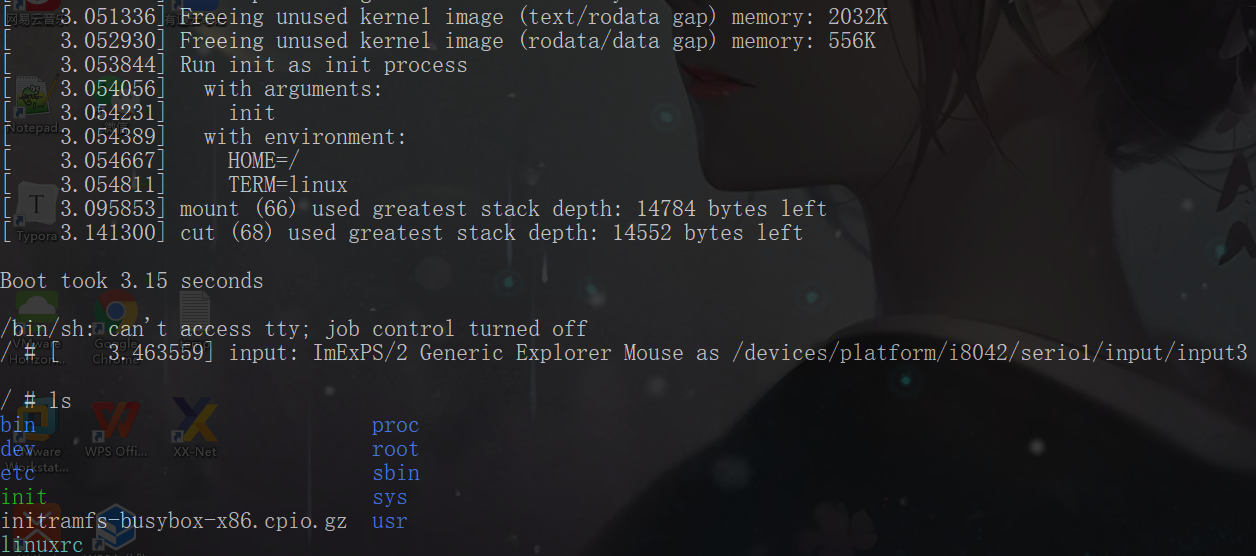
1 2 3 4 5 6 7 8 9 10 11 12 13 14 15 16 17 18 19 20 21 22 23 //补充以下,若无会导致本地ubuntu16的qemu启动的内核无echo日志输出,并直接进入 因为init退出触发的Kernel panic: not syncing: Attempted to kill init //WSL没有以下内核启动依旧可以进入虚拟文件系统 //创建init进程 sh脚本解释器使用sh,非bash,否则允许报错Failed to execute init (error -2 ) mount -t proc none /proc mount -t sysfs none /sys echo -e "\nBoot took $(cut -d' ' -f1 /proc /uptime) seconds\n" exec /bin/shEOF #chmod u+x init //运行 #qemu-system-x86_64 -m 2G -initrd initramfs-busybox-x86.cpio.gz -kernel ../vmlinuz-5.13.0-rc3+ -s -append "console=ttyS0 rdinit=init loglevel=8" -nographic 2>&1 | tee build.log
使用busybox编译出来的initramfs报错,因为没有把init文件放置在initramfs/x86-busybox,导致打包时没有打包进去
1 2 3 4 5 6 7 8 9 10 11 12 13 [ 3.464451 ] md: Waiting for all devices to be available before autodetect [ 3.465100 ] md: If you don't use raid, use raid=noautodetect [ 3.465719 ] md: Autodetecting RAID arrays. [ 3.466213 ] md: autorun ... [ 3.466446 ] md: ... autorun DONE. [ 3.477954 ] modprobe (67) used greatest stack depth: 14688 bytes left [ 3.479263 ] VFS: Cannot open root device "(null)" or unknown-block(0,0): error -6 [ 3.480054 ] Please append a correct "root=" boot option; here are the available partitions: [ 3.481083 ] 0b00 1048575 sr0 [ 3.481213 ] driver: sr [ 3.481794 ] Kernel panic - not syncing: VFS: Unable to mount root fs on unknown-block(0,0) 以上错误是因为kernel没有找到init进程,便会去解析参数root=,挂载另一个文件系统,将initrd image写入到 ram disk设备,这个时候需要指定root=作为ram disk
正确打包再执行一次
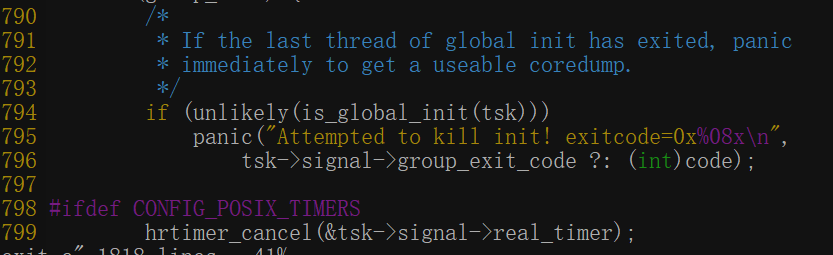
1 2 3 4 5 6 7 8 9 10 11 12 13 14 15 16 17 18 19 20 21 22 [ 137.134655] Kernel panic - not syncing: Attempted to kill init! exitcode=0x00000000 [ 137.135538] CPU: 0 PID: 1 Comm: sh Not tainted 5.13 .0 -rc3+ #1 [ 137.136020] Hardware name: QEMU Standard PC (i440FX + PIIX, 1996 ), BIOS 1.13 .0 -1 ubuntu1.1 04 /01 /2014 [ 137.136867] Call Trace:[ 137.138242] dump_stack+0x64 /0x7c [ 137.138576] panic+0xf6 /0x2b7 [ 137.138765] ? set_next_entity+0x98 /0x160 [ 137.139003] do_exit.cold+0xa0 /0xe3 [ 137.139205] do_group_exit+0x35 /0x90 [ 137.139412] __x64_sys_exit_group+0xf /0x10 [ 137.139682] do_syscall_64+0x40 /0x80 [ 137.139896] entry_SYSCALL_64_after_hwframe+0x44 /0xae [ 137.140384] RIP: 0033 :0x495f96 [ 137.140834] Code: fa 41 b8 e7 00 00 00 be 3 c 00 00 00 eb 15 66 0f 1f 44 00 00 89 d7 89 f0 0f 05 48 3 d 00 f0 ff ff 77 22 f4 89 d7 44 89 c0 0f 05 <48 > 3 d 00 f0[ 137.142124] RSP: 002 b:00007f ff3d497458 EFLAGS: 00000202 ORIG_RAX: 00000000000000e7 [ 137.142598] RAX: ffffffffffffffda RBX: 0000000001 a4a004 RCX: 0000000000495f 96[ 137.142986] RDX: 0000000000000000 RSI: 000000000000003 c RDI: 0000000000000000 [ 137.143379] RBP: 0000000000000004 R08: 00000000000000e7 R09: ffffffffffffffe0[ 137.143764] R10: 0000000001 a4bf10 R11: 0000000000000202 R12: 00007f ff3d497828[ 137.144145] R13: 0000000000000000 R14: 0000000000000001 R15: 0000000000000000 [ 137.145227] Kernel Offset: 0x24600000 from 0xffffffff81000000 (relocation range: 0xffffffff80000000 -0xffffffffbfffffff )[ 137.146167] ---[ end Kernel panic - not syncing: Attempted to kill init! exitcode=0x00000000 ]---
当init进程退出时,触发panic
Crash 因为需要将转储内核将存储在文件分区中,因此需要使用rootfs来挂载,initramfs是只存在内存中的。
配置rootfs kexec环境 1 2 3 4 5 6 7 8 9 ➜ package get http://kernel.org/pub/linux/utils/kernel/kexec/kexec-tools.tar.gz ➜ package tar -zxvf kexec-tools.tar.gz ➜ package cd kexec-tools-2.0.23 ➜ package LDFLAGS=-static ./configure ARCH=x86_64 --build=x86_64-linux-gnu --host=x86-64-linux-gnu --target=x86_64-linux-gnu --without-xen >>交叉编译 ➜ package make ➜ package cd build ➜ build cp -r man /github/busybox/initramfs/x86-busybox-rootfs/. ➜ build cp -r lib /github/busybox/initramfs/x86-busybox-rootfs/. ➜ build cp -r sbin /github/busybox/initramfs/x86-busybox-rootfs/.
构建rootfs镜像 1 2 3 4 5 6 7 8 9 10 11 12 13 14 15 16 17 18 19 ➜ build cd /github/ busybox/initramfs/ ➜ initramfs dd if =/dev/ zero of=rootfs.img bs=1 M count=8 k oflag=direct // 8 G大小, 要比运行内存要大,不然装不下转储内存 ➜ initramfs mkfs.ext4 rootfs.img >>设置文件系统格式 ➜ initramfs mkdir rootfs ➜ initramfs mount rootfs.img rootfs // 下一步需要将我们需要的文件打包到rootfs分区,因为测试crash,当第二kernel启动时依旧需要引导内核,因此需要复制linux驱动引导内核到文件系统内➜ initramfs cd x86-busybox-rootfs ➜ x86-busybox-rootfs cp /github/ linux/arch/ x86_64/boot/ bzImage /github/ busybox/initramfs/ x86-busybox-rootfs/vmlinuz-5.17 .0 + ➜ x86-busybox-rootfs mkdir -p {bin,sbin,etc,proc,sys,usr/{bin,sbin}} ➜ x86-busybox-rootfs mkdir dev ➜ x86-busybox-rootfs cp -a /dev/ {null,console,tty,tty1,tty2,tty3,tty4} dev/. ➜ x86-busybox-rootfs cp -a /github/ busybox/busybox-1.33.1/ _install/* ➜ x86-busybox-rootfs cd .. ➜ initramfs cp -r x86-busybox-rootfs/* rootfs/ . // 打包完成,退出挂载➜ initramfs umount rootfs // 检查此文件系统➜ initramfs e2fsck -p -f rootfs.img rootfs.img: 441 /262144 files (0.0% non-contiguous), 554776/ 1048576 blocks
安装最新的crash crash官网
1 2 3 4 5 6 7 8 // 安装依赖sudo apt-get install texinfo // 下载安装,最好通过github库编译安装wget https://gi thub.com/crash-utility/ crash/archive/ 8.0 .0 .tar.gz tar -zxvf crash-8.0 .0 .tar.gz // 安装,crash会自动下载匹配的gdb版本make make install
内核启动 1 2 3 4 5 6 7 8 9 10 11 12 13 14 15 16 17 18 19 20 21 22 23 24 25 26 27 28 29 30 31 32 33 34 35 36 ➜ initramfs qemu-system-x86_64 -m 1024 -smp 2 -hda rootfs.img -kernel /kvm-qemu-system/linux-vmlinux/5.17 .0 +/vmlinuz-5.17 .0 + -s -append "root=/dev/sda rdinit=init crashkernel=128M console=ttyS0 rw" -nographic 2 >&1 | tee build.log >>需要增加rw获取全部权限 mount -t proc none /proc mount -t sysfs none /sys //挂载proc 和sys虚拟文件系统 //检查crashkernel=128M是否有生效 # cat /proc /iomem ... 00001000-0009fbff : System RAM //系统物理内存启始地址为0x00001000 ... b7000000-beffffff : Crash kernel //有专门为转储内存留出空间 ... // 设置kexec command-line # kexec -p --command-line="console=ttyS0 root=/dev/sda rw" vmlinuz-5.17.0\+ //通过sysrq触发panic / # echo c >/proc /sysrq-trigger[ 190.613526] sysrq: Trigger a crash [ 190.613757] Kernel panic - not syncing: sysrq triggered crash ... [ 190.619596] </TASK>[ 0.000000] Linux version 5.17.0+ (root@sholck) (gcc (Ubuntu 6.5.0-2ubuntu1~16.04) 6.5.0 20181026, GNU ld (GNU Binutils for Ubuntu) 2.26.1) #7 SMP PREEMPT_DYNAMIC Thu Mar 24 14:58:15 CST 2022 [ 0.000000] Command line: console=ttyS0 root=/dev/sda rw acpi_rsdp=0xf6440 elfcorehdr=3128692K >>第二内核启动 mount -t proc none /proc mount -t sysfs none /sys //重新挂载proc 和sys虚拟文件系统 //copy 转储内存到本地 cp /proc /vmcore /. poweroff ➜ initramfs mount rootfs.img rootfs ➜ initramfs cd rootfs ➜ rootfs cp vmcore /kvm-qemu-system/linux-vmlinux/5.17.0+/vmcore ➜ initramfs umount rootfs
转储分析 通过crash对copy到本地的转储分析
crash最好升级到最新,不然可能出现以下问题
1 2 3 4 5 6 ➜ 5.17.0+ crash_x86_ 64 vmlinux vmcore WARNING: kernel relocated [928MB]: patching 127077 gdb minimal_symbol values please wait... (patching 127077 gdb minimal_ symbol values) [1] 6126 segmentation fault (core dumped) crash_x86_ 64 -m phys_offset=0x10000 vmlinux vmcore >>分析失败,升级crash修复
重新升级解析
1 2 3 4 5 6 7 8 9 10 11 12 13 14 15 16 17 18 19 20 21 22 23 24 25 26 27 28 29 30 31 32 33 34 35 36 37 38 39 40 41 42 43 44 45 46 47 48 49 50 51 52 53 54 55 56 57 58 59 60 61 62 63 64 65 66 67 68 69 ➜ rootfs crash vmlinux vmcore crash 8.0 .0 Copyright (C) 2002 -2021 Red Hat, Inc. Copyright (C) 2004 , 2005 , 2006 , 2010 IBM Corporation Copyright (C) 1999 -2006 Hewlett-Packard Co Copyright (C) 2005 , 2006 , 2011 , 2012 Fujitsu Limited Copyright (C) 2006 , 2007 VA Linux Systems Japan K.K. Copyright (C) 2005 , 2011 , 2020 -2021 NEC Corporation Copyright (C) 1999 , 2002 , 2007 Silicon Graphics, Inc. Copyright (C) 1999 , 2000 , 2001 , 2002 Mission Critical Linux, Inc. Copyright (C) 2015 , 2021 VMware, Inc. This program is free software, covered by the GNU General Public License, and you are welcome to change it and/or distribute copies of it under certain conditions. Enter "help copying" to see the conditions. This program has absolutely no warranty. Enter "help warranty" for details. GNU gdb (GDB) 10.2 Copyright (C) 2021 Free Software Foundation, Inc. License GPLv3+: GNU GPL version 3 or later <http://gnu.org/licenses/gpl.html> This is free software: you are free to change and redistribute it. There is NO WARRANTY, to the extent permitted by law. Type "show copying" and "show warranty" for details. This GDB was configured as "x86_64-pc-linux-gnu" . Type "show configuration" for configuration details. Find the GDB manual and other documentation resources online at: <http://www.gnu.org/software/gdb/documentation/>. For help, type "help" . Type "apropos word" to search for commands related to "word" ... KERNEL: vmlinux DUMPFILE: vmcore CPUS: 2 DATE: Fri Mar 25 18 :00:11 CST 2022 UPTIME: 00 :03:52 LOAD AVERAGE: 0.00 , 0.00 , 0.00 TASKS: 69 NODENAME: (none) RELEASE: 5.17 .0 + VERSION: MACHINE: x86_64 (3191 Mhz) MEMORY: 1 GB PANIC: "Kernel panic - not syncing: sysrq triggered crash" PID: 99 COMMAND: "sh" TASK: ffff944341f24000 [THREAD_INFO: ffff944341f24000 ] CPU: 1 STATE: TASK_RUNNING (PANIC) crash> bt PID: 99 TASK: ffff944341f24000 CPU: 1 COMMAND: "sh" RIP: 00000000004bd8b0 RSP: 00007ffca4226bf8 RFLAGS: 00000246 RAX: ffffffffffffffda RBX: 0000000001a6d860 RCX: 00000000004bd8b0 RDX: 0000000000000002 RSI: 0000000001a71500 RDI: 0000000000000001 RBP: 0000000000000001 R8: fefefefefefefeff R9: fefefeff00a4ff62 R10: 0000000000464e00 R11: 0000000000000246 R12: 0000000001a71500 R13: 0000000000000002 R14: 0000000000000001 R15: 0000000000000000 ORIG_RAX: 0000000000000001 CS: 0033 SS: 002b
参考 在qemu上运行BusyBox 使用QEMU和GDB调试Linux内核 VFS: Cannot open root device 解决思路